
Samsung's Galaxy S line is one of the most popular Android families in the world, and for travelers it has a very handy feature baked in: an embedded SIM that lets you download a data plan for another country without ever touching the physical tray. That means you can keep your home number in the nano-SIM slot and add a cheap travel plan as a second line, all from Settings. There is, however, one thing about Galaxy S phones that catches people out, and it comes down to where the phone was sold. This guide covers exactly which Galaxy S models support eSIM, the regional-variant catch, and how to install and manage a GetSim travel plan so you land already connected.
Do Galaxy S phones support eSIM?
As a general rule, the Galaxy S line has supported eSIM from the Galaxy S20 generation onward. The S20, S21, S22, S23 and S24 families, including the Plus and Ultra variants, are built with an embedded SIM alongside the physical slot, so on most of these phones you can run dual-SIM: your home number on the nano-SIM and a travel eSIM as the second line.
Here is the catch, and it is important. Samsung sells regional variants of the same model, and a few of them differ in eSIM behaviour. Certain versions sold in specific markets ship without an active eSIM even though the model name is identical to one that has it. In other words, "my friend's S21 has eSIM" is not proof that yours does, because yours might be a different regional build. This is exactly why you should never rely on the model name alone. Check the phone itself.
Confirm it on your own phone in 30 seconds
The reliable test does not care which market your phone came from, because it reads the hardware directly. Two quick checks settle it:
- Dial *#06# on the keypad. If the panel that appears includes an EID, a long identifier unique to embedded SIMs, your phone has a working eSIM.
- Open Settings > Connections > SIM manager (the exact wording varies slightly by software version). If you see an option to Add eSIM or Add mobile plan, the feature is live.
If both checks come back positive, you are ready to buy a plan. If the EID never appears and there is no eSIM option in SIM manager, you likely have a regional variant without an active embedded SIM, and you would need a physical SIM instead. The same method works for any handset; we cover it in more depth in the phone compatibility guide.
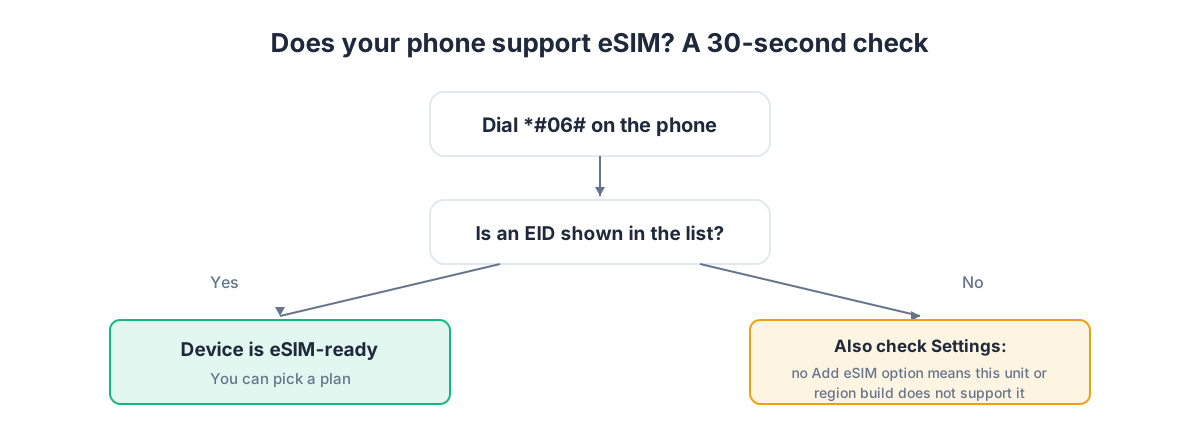
The EID is the deciding factor because it is the one thing a regional variant cannot fake. A spec sheet describes the model in general; the EID describes the exact device in your hand. When it appears, the embedded SIM is present and usable, full stop.
Why an eSIM is the easy option for a Galaxy S abroad
Because the Galaxy S is dual-SIM, a travel eSIM never disturbs your existing setup. Your home carrier stays on the physical nano-SIM, keeping your number reachable for calls and verification codes, while the travel eSIM handles all your mobile data at local rates. You decide, per app and per line, which SIM does what.
A GetSim destination plan is normally data-only. It gets your Galaxy S online in the destination country; it does not hand you a new phone number for local calls, and for travel that is the point. Maps, messaging apps, ride-hailing and translation all run on data, and you call and text over the same apps you already use. If you separately need a real number that can receive an SMS, say for a bank check, that is a virtual number, a receive-only rented mobile number that works on its own, independent of the data eSIM.
Pick your plan first
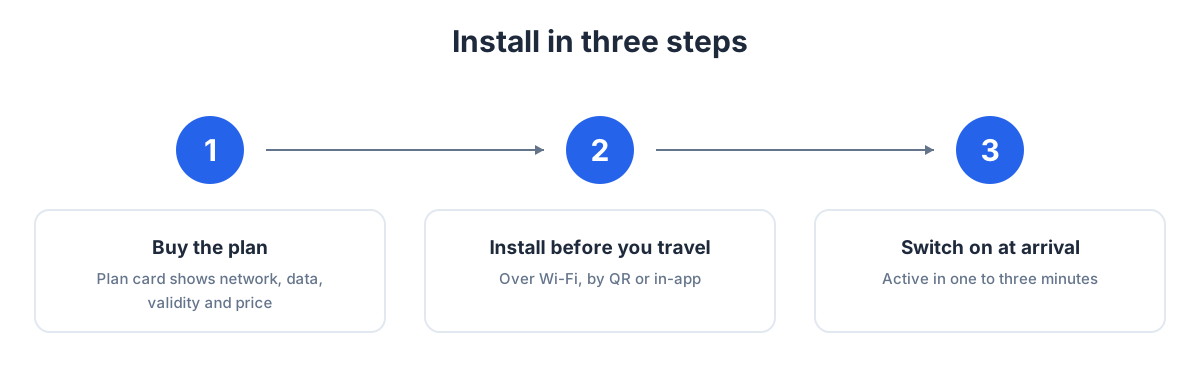
Buy before you install. GetSim covers 190+ destinations, so find your country and look at the plan card: it shows the network, the data allowance, the validity period and the price before you pay, so you know exactly what you are getting. Crossing several borders on one trip? A single regional plan can cover a whole area, which beats juggling a separate eSIM at every frontier.
One account, one shared prepaid wallet in the app, drives everything. Regular travelers top the wallet up once and pull plans from it trip after trip. And since unused, unactivated plans carry a 7-day refund, buying ahead of a trip that might still change carries little risk.
Installing a travel eSIM on Galaxy S, step by step
The install is quick. Menu labels move around a little between One UI versions, so treat the wording below as a guide and look for the closest match on your build.
- Get on Wi-Fi first. The profile downloads over the internet, so use hotel, airport or home Wi-Fi. A weak cellular link is the usual cause of a stalled install.
- Open Settings > Connections > SIM manager.
- Tap Add eSIM (some versions say Add mobile plan), then choose Scan QR code.
- Scan the QR code from your GetSim order. The phone downloads and installs the profile.
- Give the new line a name like "Travel" so it is easy to spot next to your home number.
- In SIM manager, set your preferred SIM for mobile data to the travel eSIM, and leave calls and texts on your home number.
- Enable Data Roaming for the travel eSIM. A travel eSIM uses partner networks in the destination, which the system counts as roaming for that profile, so this switch has to be on or you will have no internet despite a correct install.
Set it up at home, activate on arrival
If your trip is coming up, install before you leave. The download works over any Wi-Fi, so do the whole thing at home the day before: add the eSIM, name it, pick it as your data SIM, and just keep Data Roaming for that line off until you land. On arrival, switch Data Roaming on and the network connects by itself, no scrambling for airport Wi-Fi required. If you want the full picture, our what is an eSIM explainer and the cross-platform install walkthrough both help.
Running two SIMs smartly
Dual-SIM can nudge battery use up slightly because the phone maintains two connections. The simple fix on a trip is to stop your home line from chasing data: in SIM manager set mobile data to the travel eSIM only, so the home number still rings and receives texts but does not burn battery or money hunting for roaming data. Turn on Wi-Fi Calling for the home line too, and you will still get calls and SMS to your usual number over any Wi-Fi, at no roaming cost. Home number reachable, travel data cheap, that is the whole setup.
Topping up and reusing the eSIM
Low on data? Top up in the app without reinstalling. The profile stays put; you add data or extend validity on the same line. Next trip, keep the line and load a fresh plan from your wallet, no delete-and-re-add ritual required. The same slot serves you journey after journey.
Stretching your data on a Galaxy S
A travel plan comes with a fixed allowance, and One UI gives you good tools to make it last. Open Settings > Connections > Data usage and turn on Data saver, which stops apps from using data in the background unless you allow them. Under the same menu you can see, per app, exactly what is consuming your allowance, and restrict the worst offenders. In Settings > Cloud and accounts (or Samsung Cloud settings, wording varies by build), set backups and gallery sync to Wi-Fi only, so a week of photos does not upload over cellular. And switch app store auto-updates to Wi-Fi only in the Galaxy Store and Play Store settings.
The biggest consumers are streaming video and video calls. An hour of standard-definition streaming or a long video chat can take a real bite out of a small plan, so keep those for Wi-Fi and lower the video quality when you are on cellular. Download offline maps for your destination city before you leave Wi-Fi, and navigation will barely touch the plan. If you are not sure how large a plan to buy, our guide to how much data you need for a trip gives working estimates by activity.
eSIM versus a local SIM card
Should you just buy a local SIM at the airport instead? For a Galaxy S with a working eSIM, the embedded option is usually the better call. You skip the kiosk queue, you never pull out your home SIM and risk misplacing it, and you set everything up before you land so you walk out already connected. A local physical SIM can still make sense if you specifically need a local number for calls, but for data alone the eSIM is quicker and lower-risk. Comparing it against your carrier's own roaming package instead? The eSIM vs roaming guide breaks down when each wins.
Galaxy S eSIM: decision table
| Your situation | What to do |
|---|---|
| Galaxy S20 or newer, traveling for data | Add a data-only travel eSIM; keep your home number on the physical SIM |
| Bought abroad or unsure of the variant | Dial *#06# and check SIM manager before buying, variants differ |
| No EID and no Add eSIM option | Likely a regional build without eSIM; use a physical SIM instead |
| Multi-country trip | Choose a regional plan over one eSIM per border |
| Need to receive SMS on a real number | Add a receive-only virtual number alongside the data eSIM |
| Leaving soon | Install now over Wi-Fi, enable roaming for the travel line on arrival |
Galaxy S eSIM questions
My model name says it has eSIM, but I can't find the option. Why?
You may have a regional variant that ships without an active eSIM. The model name is not decisive; the *#06# EID check and the SIM manager are. If neither shows eSIM, the hardware profile is not active on your unit.
Will the travel eSIM replace my SIM card?
No. It is a second line. Your nano-SIM and home number stay in place, and you switch data between the two in SIM manager.
Everything installed but no internet, what now?
Check that Data Roaming is on for the travel eSIM and that it is set as your data SIM. Those two settings cause almost every "no connection" case.
Can I install before the trip?
Yes. Download over home Wi-Fi and enable roaming for the travel line when you arrive. If your destination happens to be Türkiye, complete the final activation on arrival over local Wi-Fi.
Do I need a calling plan?
Usually not. Apps handle calls and messages over data, and Wi-Fi Calling keeps your home number reachable. Data-only is enough for most trips.
Can I have two eSIMs on my Galaxy S?
Many Galaxy S models can store more than one eSIM and keep your physical SIM active too, though only a limited number of lines can be active at once. For travel you rarely need more than your home number plus one travel eSIM, and you switch the active data line in SIM manager.
What happens to my eSIM when the plan ends?
The profile stays on the phone, it just runs out of data or validity. You can top it up from the app to keep using it, or load a new plan to the same line for your next trip. Nothing is wasted and nothing needs reinstalling.
A quick pre-flight checklist
Before you leave, run through this: confirm the EID with *#06#, buy the destination plan while you still have easy Wi-Fi, install and name the eSIM, set it as your data SIM, enable Wi-Fi Calling on your home line, and leave Data Roaming for the travel line off until you land. Do those six things and arrival is effortless: switch roaming on for the travel line and you are connected before you reach the baggage carousel. It is worth doing this the evening before rather than at the gate, so any hiccup is solved on home Wi-Fi with time to spare.
In short
Galaxy S phones from the S20 generation up almost always support eSIM, but a few regional variants do not, so let the EID from *#06# and the SIM manager have the final word rather than the model name. Buy your destination plan first, install over Wi-Fi, set the travel eSIM as your data line, keep your home number for calls, and turn on Data Roaming for the travel line when you land. If you are comparing Samsung families, our Galaxy A eSIM guide covers the mid-range side of the lineup.
Ready when you are
Put this guide to use on your next trip
Travel eSIMs that install in minutes and keep your home SIM active.