
Installing a travel eSIM takes about two minutes once you know which buttons to press. The reason it feels intimidating the first time is that the settings menus use different words on iPhone and Android, and one crucial toggle hides at the very end. This guide walks through both platforms screen by screen, then troubleshoots the handful of things that actually go wrong. Follow it in order and you will land in your destination already online.
If you are still unsure what an eSIM even is, read what an eSIM is and how it works first, then come back here for the hands-on part. And if you have not yet confirmed your handset can take one, the 30-second test in how to check if your phone supports eSIM will save you a wasted purchase.
Before you start: three things to have ready
A little preparation removes almost every source of frustration.
- A Wi-Fi connection. Downloading the profile needs internet, and you cannot use the very plan you are installing to do it. Home or hotel Wi-Fi is perfect.
- Your QR code or the app. When you buy from GetSim you get an install link and a QR code. You can install straight from the app on the phone itself, or display the QR code on a second screen and scan it.
- A charged phone and ten spare minutes. Nothing here is slow, but you do not want the battery dying mid-activation or a boarding call rushing you.
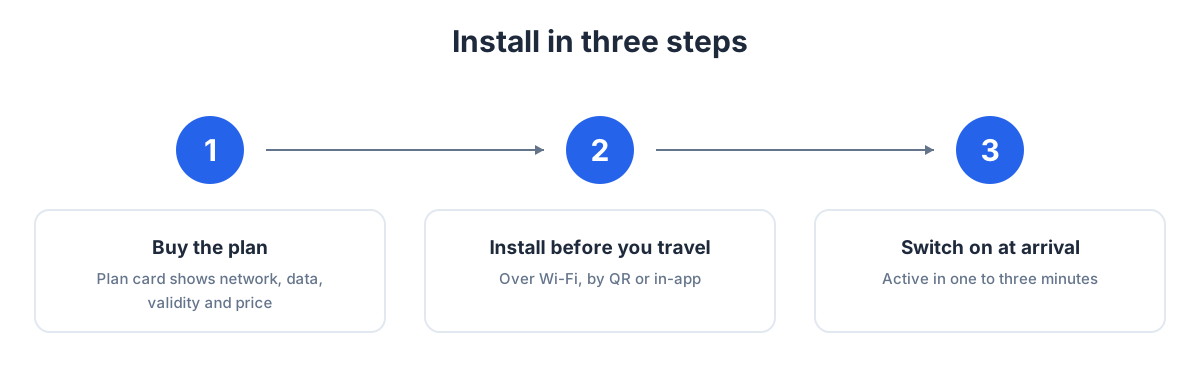
There is one timing rule to plan around. If your destination is Türkiye, the installation cannot be completed while you are physically inside the country, so buy the plan whenever you like but do the actual install once you arrive, over airport or hotel Wi-Fi. For every other destination the advice flips: if you are still at home, install and test the profile before you fly, while you have reliable Wi-Fi and no time pressure. The plan then activates the moment you land.
Buy the plan first
You install a profile that already exists, so the purchase comes first. Browse by country on the eSIM countries pages, pick the destination, and check the plan card. It shows the network, the data allowance, the validity window and the price before you pay, so you are choosing with the full picture. If you are hopping across several countries, a regional plan covers the whole area on one profile. Once you have paid, the QR code and one-tap install link are waiting for you.
Installing on iPhone
Apple calls the feature "eSIM" and keeps it under the cellular settings. The flow is the same across recent models.
- Open Settings, then Cellular (it is called Mobile Service or Mobile Data in some regions).
- Tap Add eSIM, then Use QR Code.
- Point the camera at your QR code. If you are installing on the same phone that holds the code, choose Enter Details Manually and paste the activation string instead.
- Tap Continue and let the profile download. It appears as a new line.
- When prompted, give the new line a clear label such as "Travel" so you never mix it up with your home number.
iPhone then asks you to make two choices: which line is your default for calls and texts, and which line carries cellular data. Keep your home number as the default for calls so you stay reachable, and set the travel eSIM as the data line. Leave "Allow Cellular Data Switching" off, otherwise the phone may quietly fall back to your home line's expensive roaming.
Installing on Android
Android wording varies by manufacturer, but the path is broadly consistent. On Pixel and most others it lives under network settings.
- Open Settings, then Network & internet (or Connections on Samsung).
- Next to SIMs or Mobile network, tap the + or Add SIM, then choose Download a SIM instead or Add eSIM.
- Tap Next and scan your QR code. Manual entry is available under a "need help" or "enter manually" link.
- Confirm the download and wait for the profile to register.
- Name the profile something obvious like "Travel data" so the two lines are easy to tell apart.
On Samsung the menu path can differ slightly between regional software versions, so if the wording does not match exactly, look for SIM manager under Connections. The concept is identical everywhere: add a downloaded SIM, then decide what each line does.
The step everyone forgets: enable roaming on the travel line
Here is the single most common reason a freshly installed eSIM shows no signal in the destination. A travel plan connects to a partner network abroad, and to a phone that counts as "roaming", even though you are paying a local-style prepaid price and not roaming on your home contract. So the travel line needs data roaming switched on. Your home line, meanwhile, keeps its roaming off so it never runs up charges.
On iPhone: Settings > Cellular > [your travel line] > Data Roaming = On. On Android: open the travel SIM under mobile networks and turn Roaming on for that profile only. This is the toggle that turns a correctly installed but silent eSIM into a working connection. If you remember nothing else from this guide, remember this.
Understanding the two lines you now have
After installation your phone holds two SIMs at once, and getting comfortable with what each one does removes most of the confusion that follows. Think of them as two jobs rather than two phones. One line owns your identity: your usual number, the one your bank texts and your family calls. The other line owns your internet: the prepaid data that carries maps, apps and browsing while you are away. They coexist peacefully, and the phone lets you decide, independently, which line makes calls, which sends texts, and which carries data.
The reason this matters at setup time is that the defaults are not always what a traveler wants. A phone left to its own devices might try to be clever and switch data back to your home line when the travel eSIM has a weak moment, which is precisely when roaming charges appear. That is why the guidance is to pin data to the travel eSIM and turn off any automatic data switching. You are not fighting the phone; you are simply telling it, once, that data always comes from the prepaid line and never wanders back to the expensive one. Spend the extra thirty seconds on this and you never think about it again.
A pre-departure test worth doing
For any destination other than Türkiye, there is real value in a dry run before you fly. Once the profile is installed at home, you obviously cannot get a live signal from the destination's network yet, but you can confirm three things that catch most problems: that the profile downloaded and appears as a line, that you have labelled it clearly, and that the data-line and roaming settings are configured the way this guide describes. Doing this at your kitchen table, with strong Wi-Fi and no departure clock ticking, means the only variable left on arrival is the network itself finding you, which it does automatically. Travelers who skip this and configure everything for the first time in a busy arrivals hall are the ones who end up stressed. Ten calm minutes beforehand is the cheapest insurance in this whole process.
Your first connection in the destination
When you arrive, make sure the travel eSIM is set as the active data line, switch off Wi-Fi for a moment, and give the phone a minute to find and register on a local network. If it does not connect straight away, toggle Airplane mode on and off; that forces a fresh network search. Once it registers you will see the operator name in the status bar and data will flow.
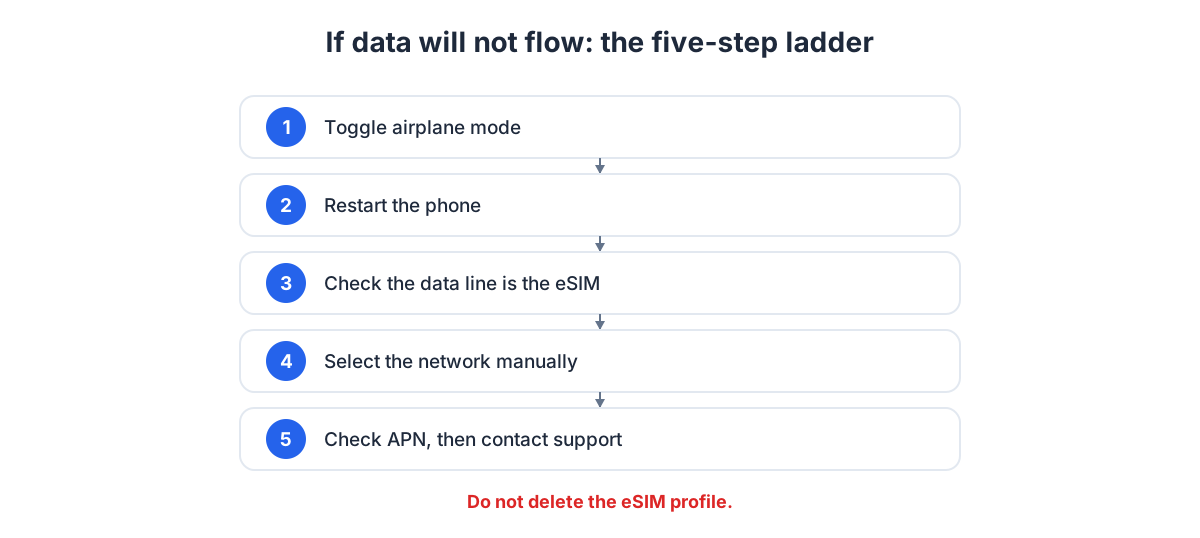
The ladder below shows the escalating fixes to try if the connection does not come up first time. Work down it one rung at a time rather than changing several things at once.
Troubleshooting the usual snags
| Symptom | Likely cause | Fix |
|---|---|---|
| "No service" after install | Roaming off on the travel line | Turn Data Roaming on for that profile only |
| Data uses the wrong line | Home line still set as data | Set the travel eSIM as the cellular/mobile data line |
| QR code will not scan | Installing on the same phone that shows it | Use manual entry and paste the activation string |
| Connected but no internet | APN or network not fully registered | Toggle Airplane mode; if needed, restart the phone |
| Two lines, confusing labels | Default names kept | Rename lines to "Home" and "Travel" |
| Signal drops in a border town | Phone latching to a cross-border tower | Select your country's network manually in settings |
Running two lines the smart way
Once installed, the goal is to keep your home number reachable without letting it spend money. The reliable configuration is: home line on, its data roaming off, kept as default for calls and texts so bank codes and family calls still reach you; travel eSIM on, set as the data line, roaming on. In this arrangement every megabyte comes from your prepaid travel plan and your home contract sits idle and free. Verification texts still arrive on your usual number because receiving a text does not need data roaming, only the line being registered.
If you are travelling somewhere your home plan will not be used at all, you can leave the home line off entirely and run only the travel eSIM. That is the simplest possible setup, though you then miss calls to your home number.
Topping up and reusing the plan
If your data runs low, you top up from the app without reinstalling the profile. The balance is a single shared prepaid wallet, so whatever you add is available immediately to the plan you are using. There is no second QR code, no re-scanning, and no interruption to your connection. When the trip ends you can leave the profile in place for next time or delete it from Settings; a prepaid plan simply stops when its data or validity runs out, with nothing to cancel. Because GetSim covers more than 190 destinations from that same wallet, your next trip usually means adding a plan, not starting from scratch.
Frequently asked questions
Will installing the eSIM delete my normal SIM?
No. The install adds a profile alongside your existing SIM. Your home number stays in the phone and stays reachable. Nothing is overwritten.
Can I install before I travel?
Yes, and for most destinations you should, so you land ready. The one exception is Türkiye, where the install has to be completed on arrival over local Wi-Fi. Buy ahead, install there.
I installed it but there is no signal. What now?
Check the roaming toggle on the travel line first, as that fixes the majority of cases. Then set it as the data line, then toggle Airplane mode, then restart. The ladder above is the exact order to follow.
Do I need to be a technical person to do this?
Not at all. It is scanning a code and flipping two switches. If you can add a Wi-Fi network you can install an eSIM. For the bigger picture on choosing plans, see how much data you need, and to weigh it against your home plan, eSIM vs roaming.
Can I install more than one eSIM on the same phone?
Yes. A modern phone can store several profiles at once, though usually only one or two are active at a time. This is handy if you are visiting several countries with separate plans, or want your next trip's plan ready alongside the current one. You switch between them in the same SIM settings menu where you installed them, turning one on and another off as you cross borders.
Does the QR code expire or stop working after I scan it?
An activation code is generally meant for a single install onto one device. Once the profile is written to your phone, the code has done its job, so treat it as one-time. If you ever move to a new phone, you install a fresh profile rather than re-scanning the old code. Keep your purchase details in the app, which is where everything is managed.
What if my plan was never activated and my trip is cancelled?
Unused, unactivated plans are covered by a 7-day refund window, so installing early carries no risk. When you are ready to buy, start at the eSIM hub or pick a country from the destinations list.
Ready when you are
Put this guide to use on your next trip
Travel eSIMs that install in minutes and keep your home SIM active.